小优智能科技有限公司成立于2015年底,是一家专注于高精度3D机器视觉模组研发、生产及销售的高科技企业。
公司自主研发的3D机器视觉模组采用激光/DLP白光编码光栅结构光+双工业相机方案,还原物体三维信息,广泛应用于消费电子领域、工业领域和安防领域,具有精度高、速度快、成本低的优势。
In recent years, the development of 3D data measurement technology and the gradual popularization of
related coordinate measuring equipment make the acquisition of 3D data more and more convenient. 3D
data measurement technology is an important part of 3D reconstruction technology. Currently, common 3D
data measurement methods are divided into contact and non-contact types [1-4].
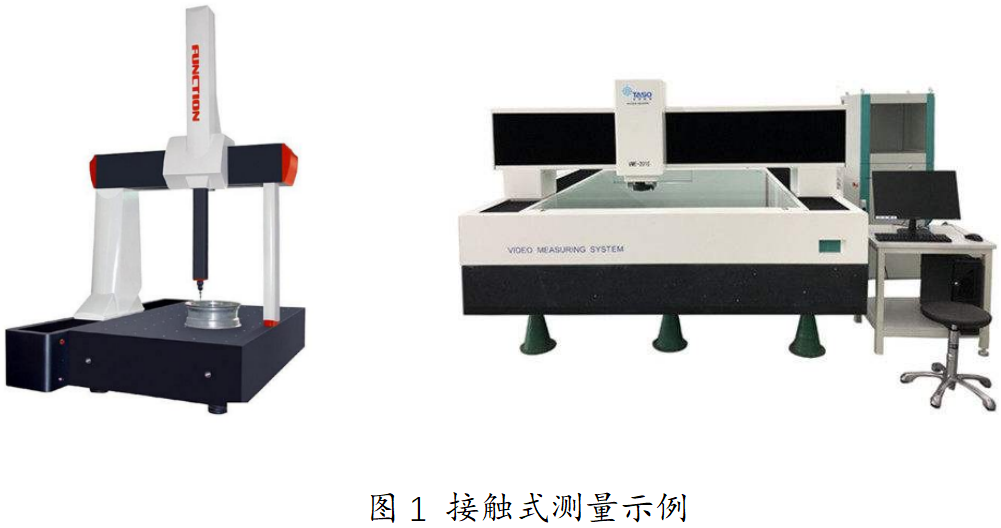
The contact method is to use some instruments to directly measure the three-dimensional data of the
scene through actual contact. The typical representative is the coordinate measuring machine (CMM),
which is used to measure some small volume important parts in the field of industrial measurement [5]. In
the manufacturing process, using a CMM to measure and obtain dimensional data for mechanical parts
and molds is one of the most effective methods, because it can replace a variety of surface measurement
tools and expensive combination gauges, and reduce the time required for complex measurement tasks
from hours to minutes, which is not achieved by other instruments. The data obtained by the contact
method has high accuracy and is less affected by environmental factors, but the cost is high, and it is only
suitable for objects with more standard surface geometry. The application of the object to be measured is
limited to some extent in cases where the surface of the object to be measured is complex, the surface
of the object is soft and easy to deform, and the surface geometry of the object is less. What's more, it is very difficult to obtain large amounts of three-dimensional point cloud data of objects using contact
measurement methods.

Different from the contact method, the non-contact method does not touch the measured object during
measurement, maintains a certain distance from it, and obtains target data through light, sound, magneticfield and other media [6]. Although the measurement accuracy is lower than that of the contact
measurement method, with the development of science and technology, the measurement accuracy of the
non-contact method has been greatly improved. In the field of 3D reconstruction, the non-contact
measurement method is more widely used than the contact measurement method.
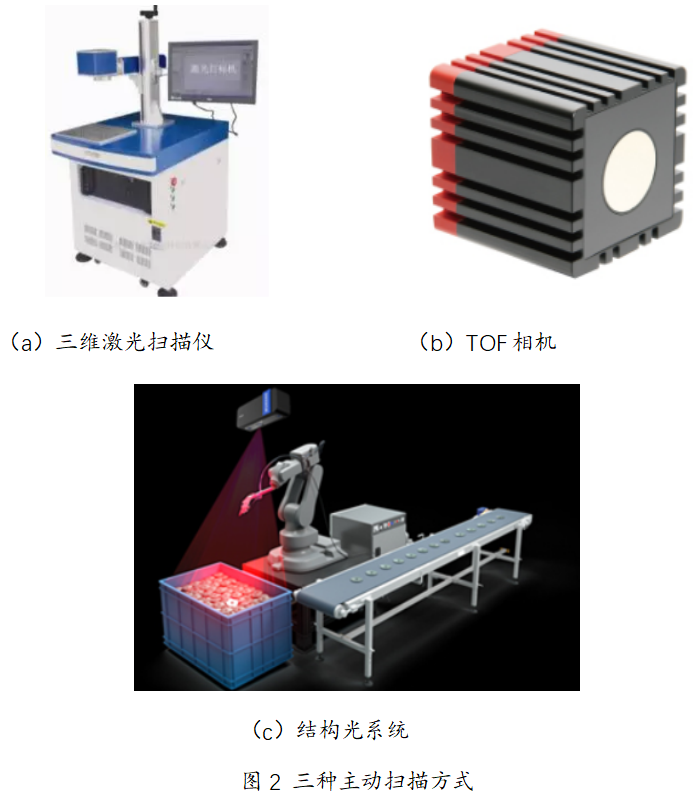
Non-contact scanning is divided into active scanning and passive scanning according to different scanning
methods. As shown in Figure 2, active scanning commonly includes 3D laser scanning technology [7],
Time-of-Flight camera [8], structured light system [9] and so on.

Three-dimensional laser scanning technology is also known as reality reproduction technology, laser
points or linear laser beams are issued for the object or scene to be measured, and the light reflected by the object to be measured is received through the photoelectric element, and the timer determines the time of the laser beam from transmission to reception, so as to calculate the distance between the object
to be measured and the device. This method can obtain more accurate depth information, and can record
a large number of dense point coordinates, the disadvantage is that the price is high and the data
information is large. Omari et al. [10] proposed to apply 3D laser scanning technology to the generation of
progress reports in construction projects. Data generated by scanning construction sites with 3D laser
scanners at different times were then used to estimate the workload performed within the time interval of
two consecutive scans, so as to improve the speed and accuracy of data collection from construction
sites. Ghahremani et al. [11] proposed a method to obtain point clouds with a handheld 3D laser scanner to
ensure the quality of high-frequency mechanical impact processing. The method carried out different
degrees of impact processing on five welding patterns, then used a handheld 3D laser scanner to scan the
point cloud data of the welding joint, and determined different impact processing by measuring the
geometric parameters of the point cloud.
The TOF camera uses modulated near-infrared light to detect the target, and the sensor calculates the
time required for the round trip of the light to convert the distance between the object and the device to
obtain the depth information. Combined with the traditional camera shooting, the three-dimensional outline
of the object can be represented by different colors representing different distances. This method can
quickly and easily obtain the depth data, without the need for redundant auxiliary scanning equipment, the
disadvantage is that the price is still high compared with the ordinary camera, the measurement results are
affected by the properties of the measured object, and the system error and random error have a
significant impact on the results. Heide et al. [12] changed the scene reconstruction formula into a linear
inverse problem on the transient response of the scene, recovered objects outside the line of sight from
second-order diffuse reflection, and used TOF cameras to obtain scene information, thus effectively
reconstructing the scene of a large room. Koutsoudis et al. [13] used TOF cameras to carry out 3D
reconstruction of Ottoman Empire monuments in Kessanci region, Greece, and questioned the applicability
of the moving-Structure-Intensive Multi-view 3D reconstruction (SVM-DMVR) method through digital
analysis of the complete 3D model of the monuments.
Structural light is a set of system structure composed of projectors and cameras. After projectors project
specific light information to the surface of the object and after the background, the camera collects it.
The position and depth of the object can be calculated according to the changes in the light signal caused
by the object, and then the whole three-dimensional space can be restored [14]. The advantage of
structured light system is that the quality of image data is better, but it requires multiple cameras to
coordinate and work together, and it is greatly affected by lighting conditions, which has high requirements
for the system. Deetjen et al. [15] proposed a new automatic calibration method for structured light
systems such as camera-projector, which realizes calibration through automatic image processing and
optimization of bunched adjustment parameters, and can be applied to quality control, autonomous
systems, engineering measurement, motion capture and other fields. Heist et al. [16] proposed a "5D
sensor" that quickly and accurately measures surface shape and spectral characteristics through
structured light. The sensor provides excellent spatial and spectral resolution, excellent depth accuracy
and high frame rate, which can be applied in fields such as medical imaging, precision agriculture or
optical sorting. Table 1 compares the common scanning methods.